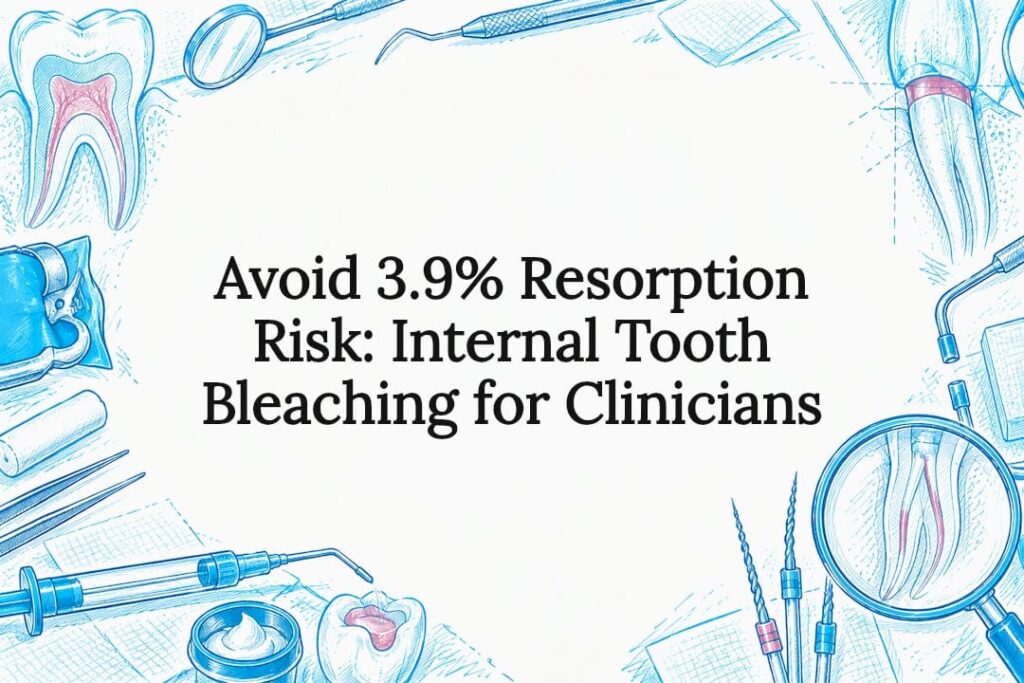
Internal tooth bleaching is an effective, conservative option for many discolored root canal-treated teeth when the canal seal is sound and modern safety steps are followed. The main trade-off is straightforward: it preserves tooth structure far better than a crown or veneer, but it carries a rare, serious risk of external cervical resorption if the protective barrier or bleaching agent is mismanaged.
TL;DR:
- Internal bleaching is most effective for teeth discolored by trauma or necrosis, especially when performed soon after root canal treatment.
- Using a proper intraorifice barrier and limiting the number of sessions reduces the risk of external cervical resorption, which occurs in about 3.9% of cases.
- The walking bleach method is the most common and controllable, with a typical duration of around two weeks for noticeable results.
- Opalescence Endo has demonstrated faster whitening and better stability at 12 months compared to traditional hydrogen peroxide and sodium perborate mixtures.
- For stains from metallic sources or sealed materials, bleaching often offers limited improvement, and crowns or veneers may be more predictable.
questions about this? we're happy to help.
Every patient's situation is a little different. If you want to talk through what this means for you, our Greenville team is one call away.
schedule a free consultationTable of Contents
- Who is a good candidate for internal bleaching
- Techniques and materials used in internal bleaching
- Step-by-step: what happens during a walking-bleach procedure
- How well does it work, and how long does it last
- Risks, complications, and how we reduce them
- Aftercare, maintenance, and when to consider alternatives
- Practitioner-level details that improve outcomes
- How we approach internal bleaching assessments
- Schedule an evaluation for your discolored tooth
- FAQ
- Sources
Who is a good candidate for internal bleaching
Nonvital teeth discolor for a handful of predictable reasons: internal bleeding after trauma, pulp necrosis, or leftover endodontic materials like certain sealers staining the dentin from within. Before recommending internal bleaching, we confirm the discoloration pattern matches one of these causes rather than an external, enamel-level stain that would respond better to veneers or bonding.
A thorough workup always starts with radiographs to check that the root canal filling is dense, well-condensed, and free of periapical pathology. When the seal looks incomplete or there is unresolved infection, retreatment of the root canal comes first, since bleaching over a compromised seal invites leakage and failure.
Several factors shift the odds of success:
- Discoloration from trauma or necrosis generally bleaches more predictably than stains from metallic or material-related sources.
- Teeth treated more recently tend to respond faster than those discolored for many years.
- A history of significant dental trauma can warrant closer monitoring for resorption risk during and after treatment.
Techniques and materials used in internal bleaching
Three techniques dominate clinical practice, each with a different balance of control, convenience, and risk.
Walking bleach places an oxidizing agent inside the pulp chamber behind a temporary seal, left for several days to a couple of weeks between visits. It is the most commonly favored approach because it does not depend on the patient wearing a tray and keeps the bleaching agent contained behind a controlled barrier, as described in narrative reviews of internal bleaching methods.
Inside-outside bleaching combines an open or semi-sealed access cavity with a take-home tray the patient fills with gel, similar to over-the-counter whitening. It can work faster but shifts more responsibility onto the patient, who has to keep the access cavity clean and follow a strict wear schedule.
In-office bleaching uses higher-concentration agents applied directly under careful isolation, typically to accelerate a single visit’s result, but it demands more rigorous rubber-dam isolation and barrier protection because of the stronger chemistry involved.
The agents themselves vary:
- Hydrogen peroxide at various concentrations is the most potent oxidizer and produces the fastest visible change, but higher concentrations carry more safety considerations.
- Carbamide peroxide breaks down more slowly into hydrogen peroxide, giving a gentler, more gradual effect often preferred for walking-bleach protocols.
- Sodium perborate, mixed with water or peroxide, has long been a mainstay because of its predictable release profile and lower resorption signal in older literature.
A newer proprietary system, Opalescence Endo, has been studied directly against the traditional combination of 30% hydrogen peroxide with sodium perborate, with results discussed below.
Step-by-step: what happens during a walking-bleach procedure
A typical walking-bleach case unfolds over a defined sequence rather than a single appointment:
- We photograph and document the baseline tooth shade and take radiographs to confirm the root canal filling is intact.
- The access cavity is reopened, and any root-filling material above the gumline is removed and the pulp chamber is cleaned and disinfected.
- A protective intraorifice barrier, typically glass ionomer or mineral trioxide aggregate (MTA), is packed just below the cementoenamel junction to seal off the dentinal tubules that lead toward the root surface.
- The bleaching agent is placed in the chamber, the access is temporized, and the patient returns every one to two weeks, with a defined maximum number of sessions set in advance rather than open-ended repetition.
- Once the target shade is reached, the bleaching material is fully removed, the chamber is cleaned, and a permanent restoration seals the access.
Pro Tip: Ask your dentist how many bleaching sessions they plan for before starting, since capping the number up front helps avoid overbleaching and unnecessary chemical exposure.
Skipping the barrier step or rushing the recall schedule is where most avoidable problems start, which is why each visit in this sequence has a specific safety purpose rather than being just a chemistry refill.
How well does it work, and how long does it last
Short-term results tend to be encouraging. Across clinical studies, many patients see a measurable shade improvement within one to two sessions and report high satisfaction with the outcome.
A randomized clinical trial of 122 nonvital teeth found that Opalescence Endo produced faster whitening than 30% hydrogen peroxide mixed with sodium perborate, with a mean time to first visible color change of about 1.95 days versus 3 days for the traditional mixture, and better lightness values on objective shade measurement. Both groups maintained good stability and patient satisfaction at 12 months, and teeth with more severe initial discoloration showed a larger percentage recovery in lightness with Opalescence Endo.
Long-term stability is less uniform. Narrative reviews note that some bleached teeth relapse gradually over years, with the cause of discoloration and the time elapsed since the original root canal treatment both shaping how durable the result stays. A tooth discolored by trauma tends to hold its new shade better than one stained by a metallic or material-based source.
Risks, complications, and how we reduce them
The complication that matters most is external cervical resorption, a process where the root surface near the gumline begins to break down, sometimes years after the bleaching was performed. It is strongly associated in older case series with high-concentration hydrogen peroxide (30 to 35%) and with thermocatalytic techniques that use heat to speed up the chemical reaction.
A historical clinical analysis found cervical resorption in roughly 3.9% of cases in a studied cohort of internally bleached teeth, a rate the source describes as rare but serious enough to shape every modern safety protocol around avoiding it.
The mitigations that lower this risk are well established:
- Place a robust intraorifice barrier before any bleaching agent goes near the pulp chamber.
- Avoid thermocatalytic (heat-activated) bleaching entirely.
- Use lower-concentration agents, such as carbamide peroxide or sodium perborate mixtures, when the case allows it.
- Confirm there is no active periapical infection before starting treatment.
If a patient notices pink discoloration near the gumline, discomfort, or mobility after bleaching, the right next step is prompt radiographic imaging and, if resorption is suspected, referral to an endodontist for further evaluation rather than waiting to see if it resolves on its own.
Aftercare, maintenance, and when to consider alternatives
Once the target shade is reached, the active phase ends with removal of the bleaching material, a thorough cleaning of the chamber, and placement of a permanent restoration, usually a bonded composite or crown depending on how much tooth structure remains.
A few habits help the result last:
- Keep a shade photo on file so any gradual change is easy to spot early.
- Consider external whitening on neighboring teeth if a visible shade mismatch remains.
- Expect that stains from certain root canal sealers or metallic sources respond less completely and may need a restorative cover instead of further bleaching.
When internal bleaching cannot reach an acceptable shade, or the stain is material-related rather than tissue-related, veneers, bonding, or a crown become the more predictable path, trading some tooth reduction for a guaranteed, uniform color. Our cosmetic dentistry team can walk through that trade-off during an evaluation.
Practitioner-level details that improve outcomes
A few technical details separate a reliably even result from an inconsistent one. Working under magnification, sometimes called microbleaching, lets a clinician remove staining remnants from the pulp chamber far more completely than is possible with the naked eye, which tends to produce a more stable final color.
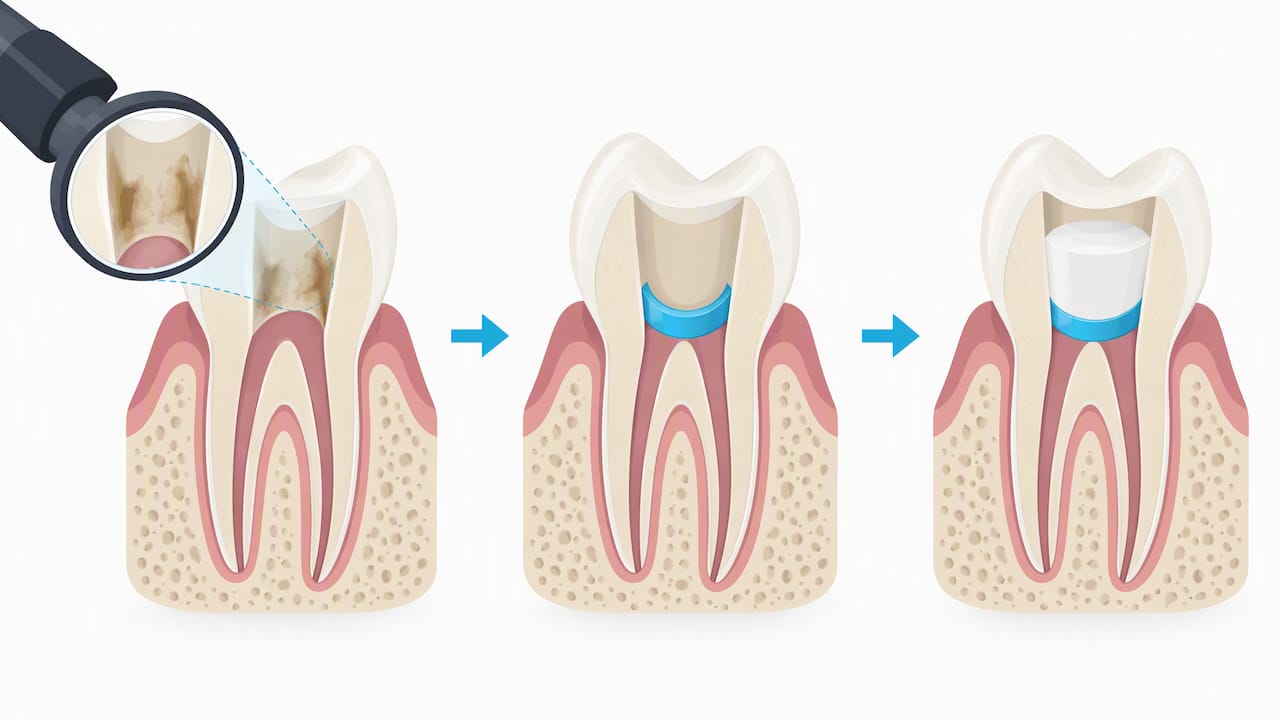
The intraorifice barrier itself benefits from being shaped like a bobsled tunnel: a smooth, curved layer of glass ionomer or MTA that fully blocks the dentinal tubules opening toward the cervical root surface rather than just capping the chamber floor. This shaping detail is one of the clearest defenses against peroxide migrating toward the periodontal ligament.
During the multi-week walking-bleach phase, the temporary material matters too. Hydrophilic options such as Cavit G or Coltosol F have shown superior marginal sealing in laboratory testing compared to some alternatives, which helps keep the chamber sealed between recall visits.
Pro Tip: Keep every scheduled recall during active bleaching. Missing a visit lets the agent sit unmonitored, which raises the odds of an uneven result or an avoidable complication.
How we approach internal bleaching assessments
Candidates are evaluated with radiographs and, where needed, magnification to confirm the root canal seal and chamber condition before internal bleaching is recommended. The priority is matching safeguards, an intact barrier, appropriate agent selection, and a defined recall schedule to each tooth’s specific history, while explaining shade expectations and restorative alternatives clearly to help patients decide with full information.
— Complete Dental Care
Schedule an evaluation for your discolored tooth
If a root canal treated tooth has darkened, the clearest next step is an in-office assessment with radiographs and shade documentation so we can confirm whether internal bleaching fits your case or whether a restorative option makes more sense. We follow conservative, evidence-aligned protocols rather than rushing to the strongest chemistry available, because a predictable result matters more than a fast one.
- Visit our general dentistry page to learn about root canal care and pre-bleaching evaluation.
- Explore cosmetic dentistry options if bleaching alone will not fully resolve the shade.
- Ask about our membership plan if you are weighing costs across several treatment options.
This article is general information, not a substitute for advice from a qualified doctor. Consult a qualified healthcare professional about your own circumstances before acting on anything here.
FAQ
Does internal bleaching of a tooth work?
Yes, for many nonvital teeth discolored by trauma or necrosis, internal bleaching produces a measurable shade improvement with high patient satisfaction in clinical studies. Results are less predictable for teeth stained by metallic or material-related sources, which may need a restorative solution instead.
How long does tooth internal bleaching last?
Short-term results are generally stable through at least 12 months in clinical trials, though some bleached teeth gradually relapse over several years. Durability depends mainly on the original cause of discoloration and how soon after root canal treatment the bleaching was performed.
Does internal bleaching a tooth hurt?
The procedure itself is typically painless since the tooth is nonvital and has no living nerve to register sensitivity inside the chamber. Mild sensitivity in surrounding gum tissue or adjacent teeth can occur, and our whitening sensitivity protocols address that kind of discomfort when it arises.
What are the disadvantages of internal bleaching?
The main drawback is a rare but serious risk of external cervical resorption, historically linked to high-concentration hydrogen peroxide and heat-activated techniques. It also will not fully correct stains from certain sealers or metallic materials, and results can require multiple sessions over several weeks before reaching a stable final shade.
Sources
- Internal bleaching: Comparing the effectiveness of Opalescence Endo and 30% hydrogen peroxide with sodium perborate – A randomized clinical trial
- Managing discoloured teeth: internal bleaching outcomes and complications (narrative review)
questions about this? we're happy to help.
Every patient's situation is a little different. If you want to talk through what this means for you, our Greenville team is one call away.
schedule a free consultation